Table of Contents
After completing the enrollment, or any time LiftOff is started following enrollment, you will see one of two screens:
LiftOff Buildings
Destinations that can be Called
If you are in a LiftOff-enabled elevator lobby, you will see the destinations that you are authorized to call as detailed in Destination Selection.
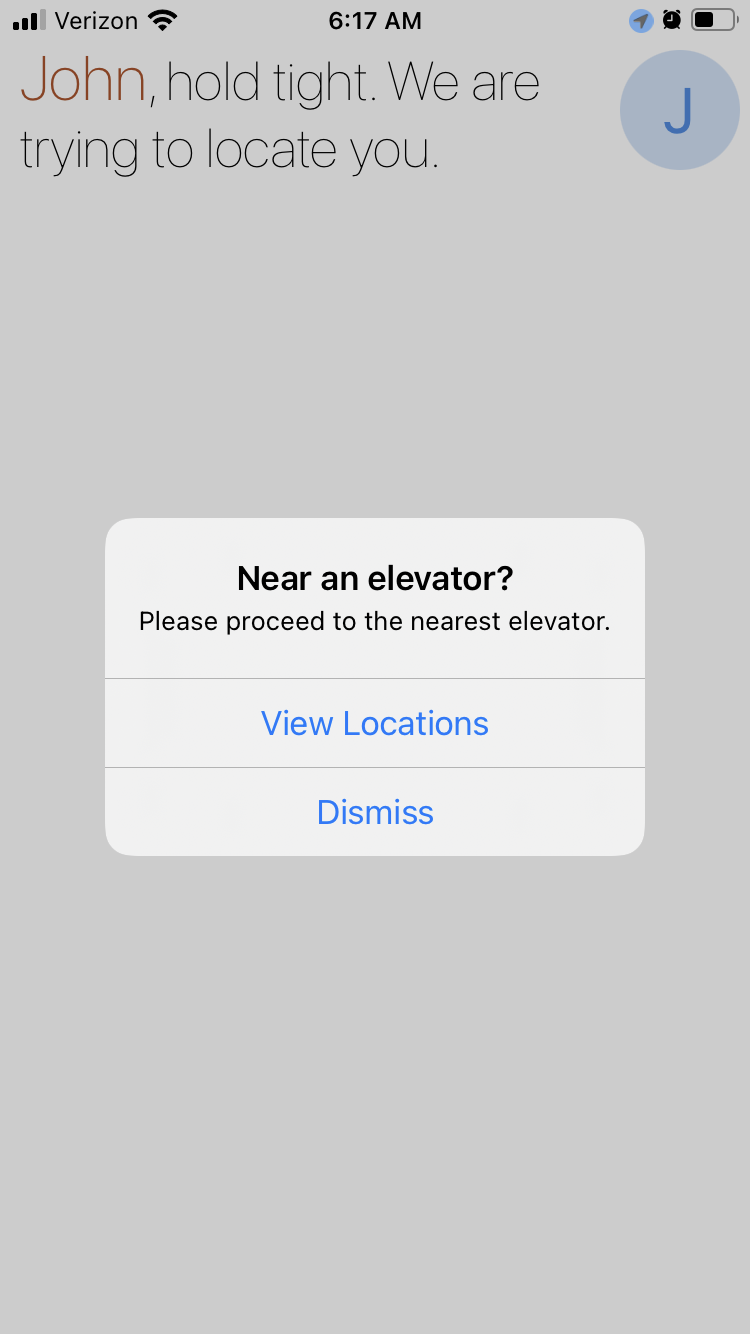
If you are not in a LiftOff-enabled elevator lobby, you will see a message asking if you'd like to Dismiss the message and continue scanning for nearby LiftOff-enabled elevators, or if you'd like to view a list of buildings. If you view a list of LiftOff-enabled buildings, you can then select a building to make a Request for Access as described in Request for Access:
When you are within range of a LiftOff-enabled elevator lobby, you will be presented with a screen similar to this:
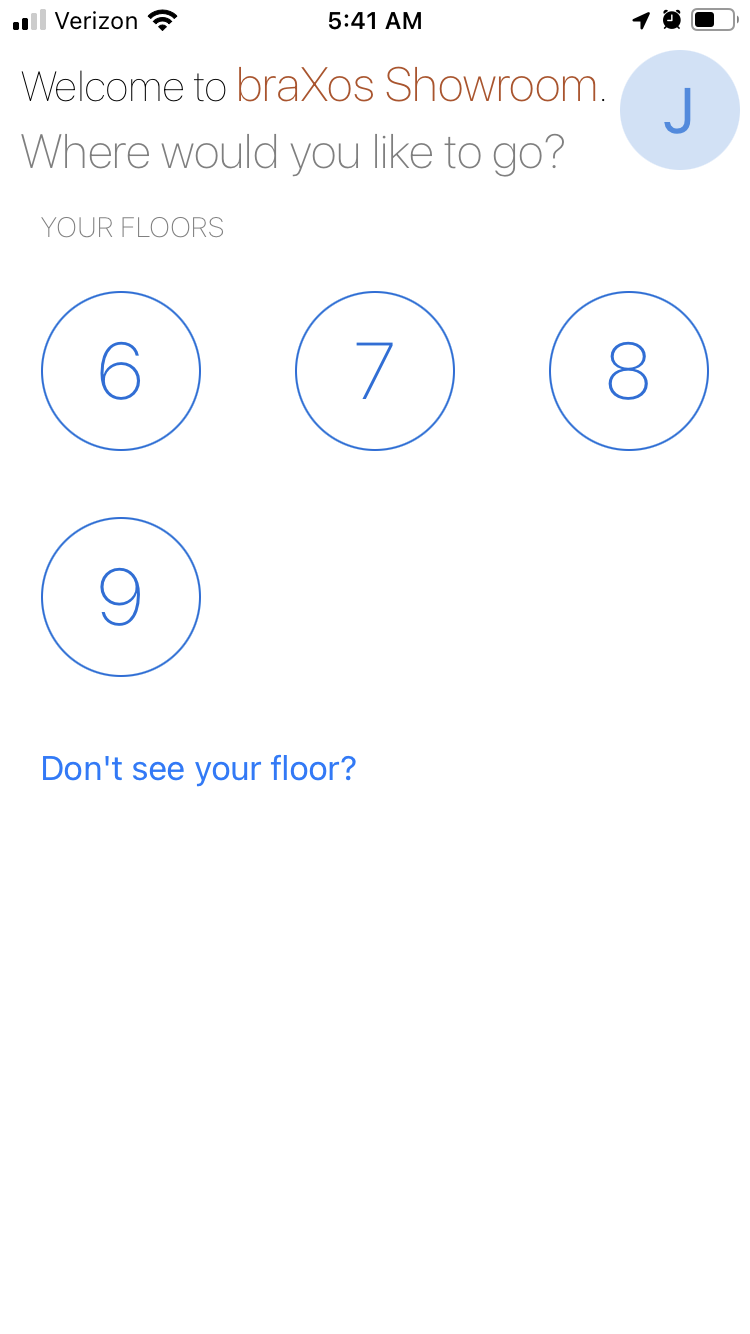
The LiftOff app will inform you as to which floor you are on and in which building. There may be a small indicator above the destination floor buttons indicating the Elevator Bank you are near. The destinations displayed are those destinations you are authorized to travel to at the current time. If you feel you ought to be able to travel to a destination not displayed, you can tap the Don't see your floor? link to request access. For details on requesting access, see Request Access.
If you have visited the building many times, and if there are many destinations available, LiftOff will learn what destinations you are likely to call and will display those destinations as Hot Button destinations at the top of the interface:
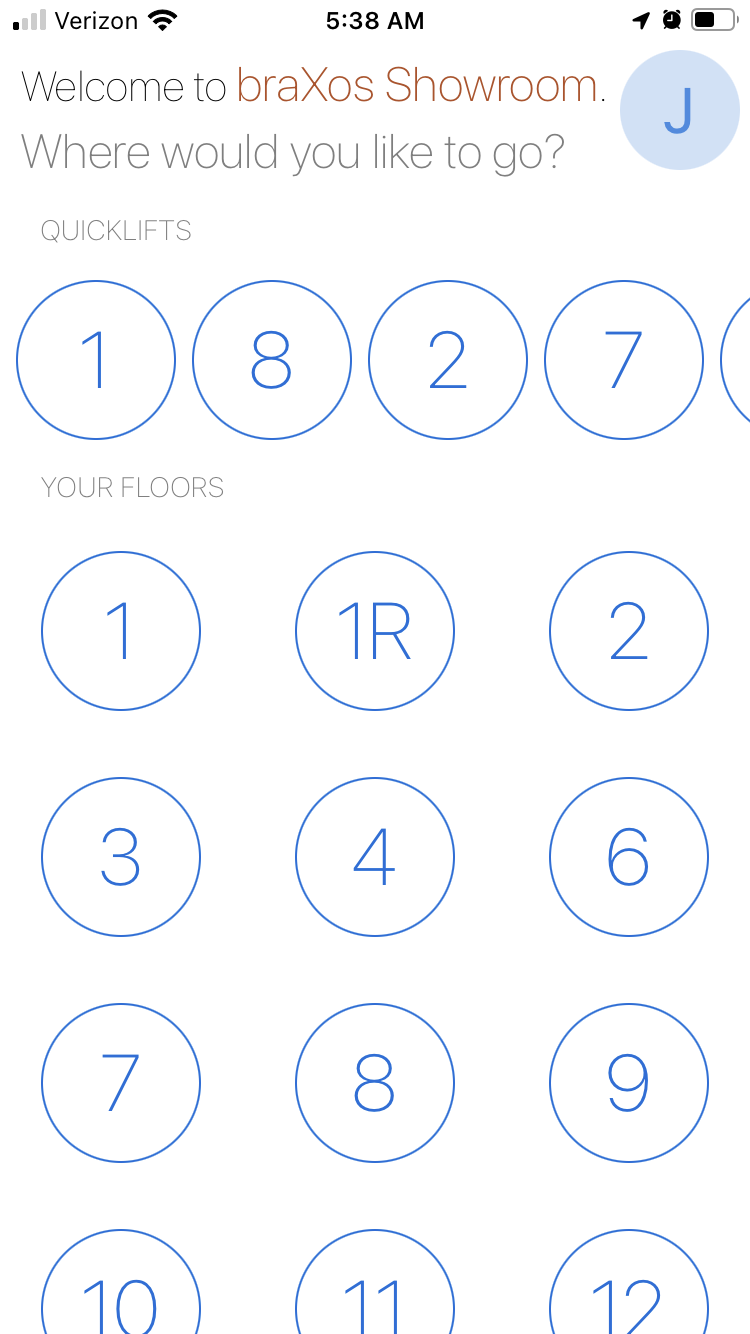
This allows you to quickly choose your frequently accessed destination without having to scroll
through the available set.
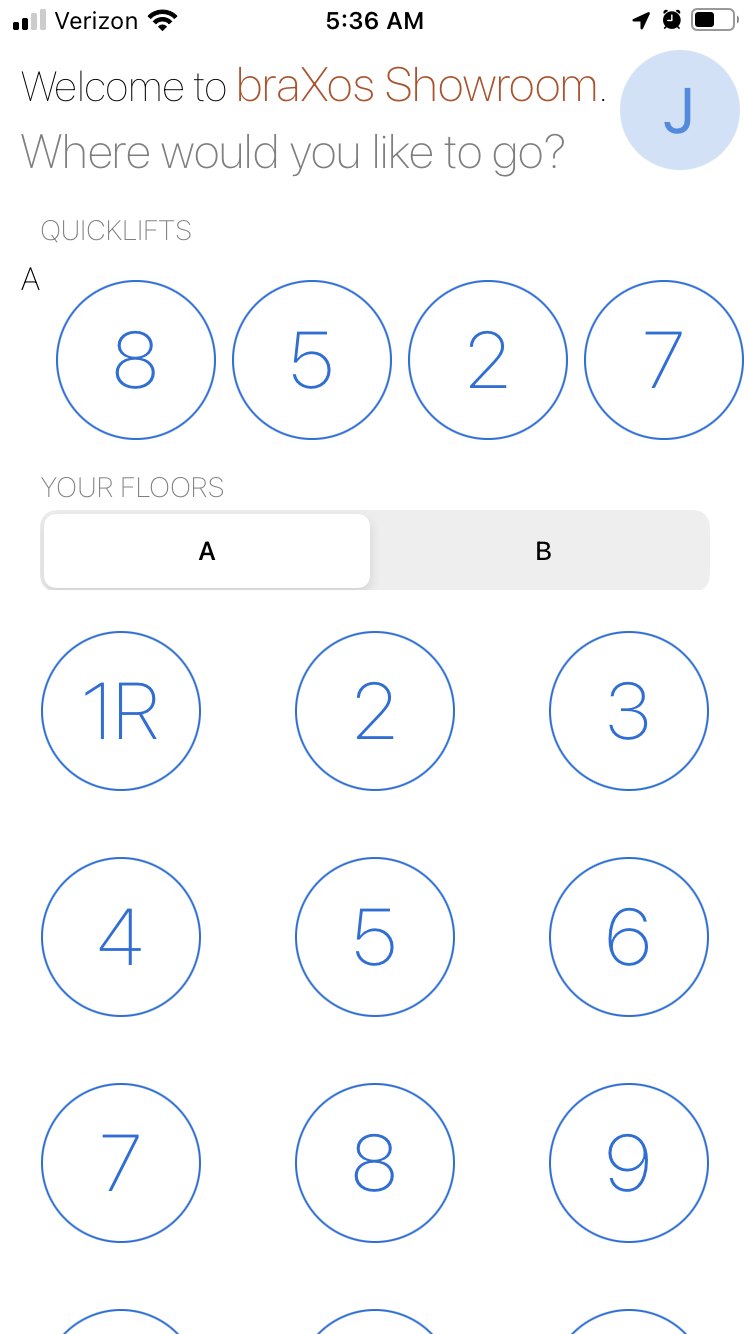
In some cases, you may be present at an elevator lobby where multiple banks with different sets of destinations are offered. In this case, the elevator manufacturer may have configured LiftOff so that you are presented with both sets of destinations at once. If so, you may choose your destination by first choosing the bank, and then the destination. The elevator bank you are closest to is displayed by default:
Tapping on a destination will call an elevator. The car you should proceed to is displayed in a screen similar to this:
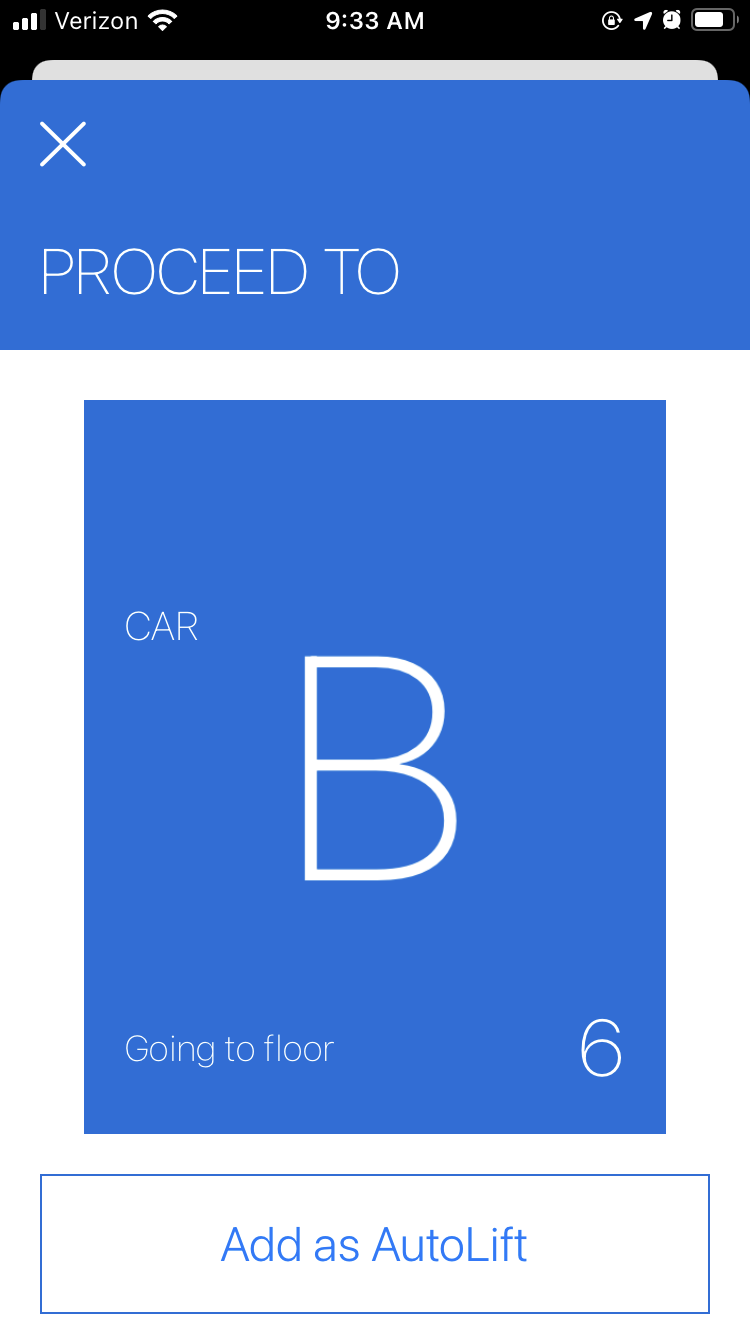
When you get to that car, depending upon the elevator system, you should be able to see your
destination in the car jamb. If you want to create an AutoLift from
your call, you can tap the button to create an
AutoLift quickly. See AutoLifts for
more details.
After a few moments, the car allocation screen will automatically close, and return you to either the Destinations screen if you are near an elevator lobby, or the screen of nearby buildings.